How to Replace the Power Window Switch for Suzuki Swift
If you own a Suzuki Swift, you already know it’s a compact powerhouse designed for smooth rides and urban adventures. But what happens when your power window button starts giving you trouble? A malfunctioning swift power window button can be more than just an inconvenience; it can turn your daily drive into a frustrating experience. Fear not! Replacing the Power Window Switch For Suzuki Swift is easier.
Understanding The Role of The Power Window Button in Your Suzuki Swift
The power window button in your Suzuki Swift enhances convenience and comfort. With just the push of a finger, you can raise or lower windows effortlessly. This feature is especially valuable during hot weather when you want to let fresh air circulate without rolling down the entire window.
Beyond mere convenience, these buttons are also designed for safety. They provide a quick means to open windows fully, which can be essential in emergencies. For instance, if you need to escape from the car quickly, having working power windows can make all the difference.
Moreover, modern vehicles like the Suzuki Swift often have features that allow for one-touch operation. This functionality means that pressing the button lightly will automatically complete its action—perfect for drivers on the go who appreciate efficiency.
Over time, wear and tear can affect how this button performs. Dust accumulation or electrical issues might hinder its responsiveness. Recognizing these signs early ensures that you maintain optimal performance.
Understanding how integral this simple component is helps underscore why it must be replaced promptly if problems arise. A functioning swift power window button keeps your driving experience smooth and enjoyable.
Signs That Your Power Window Button Needs Replacement
If your power window button becomes unresponsive, it’s a clear sign that something is amiss. You might press the button, and nothing happens. This could indicate that it’s time for a replacement.
Another common issue is if the button feels sticky or gets stuck frequently. If you’ve experienced this frustration, it may signal wear and tear inside the mechanism. A smooth operation is essential for optimal performance.
Strange noises can also hint at underlying problems with your window controls. If you hear grinding or clicking sounds when pressing the button, don’t ignore them; they often suggest malfunctioning components needing attention.
Sometimes, one side works while the other doesn’t. If only certain windows respond to their respective buttons while others remain silent, replacing those faulty switches may be necessary to restore full functionality.
Intermittent issues are also worth noting. If your window occasionally operates but often fails to respond when prompted, consider a replacement soon rather than waiting until it completely breaks down.
Tools And Materials Needed for Replacing the Swift Car Power Window Switch
Having the right tools is essential when replacing the Swift Car Power Window Switch. Start with a flathead screwdriver or trim removal tool. These will help you safely pry off the door panel without causing any damage.
A Phillips head screwdriver is also necessary for unscrewing bolts that secure the switch assembly. Make sure to have various sizes on hand, as different screws may be used throughout the process.
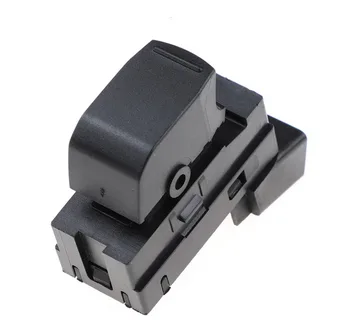
You’ll need a replacement power window button designed for your Swift model. It’s wise to check compatibility before purchasing to ensure it fits perfectly and works correctly.
In addition to these tools, consider using a small container or magnetic tray for organizing screws and small parts during disassembly. This prevents the loss of components and makes reassembly much smoother.
Keep cleaning supplies nearby—like rubbing alcohol and microfiber cloths—to clean any dirt or debris from around the installation area. Clean surfaces promote better adhesion if needed, ensuring everything looks neat when finished with this DIY task.
Step-By-Step Guide to Replacing the Power Window Button
Start by ensuring your Suzuki Swift is parked on a flat surface with the ignition turned off. This step enhances safety while you work on the power window button. Disconnect the car battery to prevent any electrical mishaps during the process.
Next, use a trim removal tool or a flathead screwdriver to pry off the panel surrounding the power window button carefully. Take your time; you don’t want to damage any clips or surfaces in this area. Once removed, set it aside gently.
Once you can access the connector beneath, disconnect it by pressing down on its release tab and pulling it out slowly. With that done, it’s time to remove the old power window button from its housing. Typically, it’s attached with screws—use an appropriate screwdriver for this task.
Now grab your new swift power window button and connect it securely where the old one was located. Ensure all connections are tight and there’s no exposed wiring before reassembling everything back into place.
Replace that panel you removed earlier and snap it back into position firmly so everything fits snugly without gaps.
Potential Challenges When Replacing the Power Window Switch For Swift
Replacing the Power Window Switch For Swift can seem straightforward, but challenges may arise. One common issue is locating the right replacement part. Not all buttons are created equal, and finding an OEM (Original Equipment Manufacturer) part ensures compatibility.
Another challenge is accessing the button itself. To reach it, the door panel often requires removal, which can be tricky if you’re unfamiliar with your vehicle’s interior setup. Ensure you have a proper guide for disassembling without damaging clips or wiring.
Wiring problems can also complicate matters. If a short circuit or damaged wire is connected to the window button, replacing just the switch won’t solve your problem. You might need additional repairs that require more tools and expertise.
Time management plays a role, too; rushing through this process could lead to mistakes like incorrect installation or overlooking crucial steps. Patience is key when tackling such repairs.
Inadequate lighting while working on this project may hinder visibility and significantly increase frustration levels. Ensure your workspace is well-lit before starting any work on your Swift power window button replacement.
How To Ensure Proper Installation And Functionality
Testing the Button Before Full Reassembly
Before fully reassembling everything, it’s essential to test the button to confirm it operates smoothly. Temporarily reconnect the battery and press the button to check its performance. This test helps you identify any potential issues early on, allowing you to make adjustments without having to disassemble everything again later.
Reinstalling Panels and Covers Correctly
When reinstalling the panels or covers around the button, pay careful attention to alignment. Misalignment can lead to friction or pressure on the new switch, which may cause damage over time. Taking your time with this step ensures that the button and surrounding components are secure and won’t be compromised.
Listening for Unusual Noises During Operation
During operation, it’s important to listen for any unusual sounds such as grinding or clicking. These noises could indicate underlying issues with the switch itself or with other components of the window mechanism. Being attentive to these sounds can help you identify problems before they become more serious.
Observing Window Movement After Replacement
Once the installation is complete, take a moment to observe how well the window moves up and down. Smooth operation indicates a successful installation. If the window stutters or moves unevenly, further checks on both the wiring and mechanical parts of the window mechanism may be needed to ensure efficient operation.
The Importance Of Using Quality Replacement Parts
When replacing your Suzuki Swift’s power window button, it is crucial to choose quality replacement parts. Inferior components may seem like a bargain but often lack durability and reliability. Investing in high-quality parts ensures that your repairs last longer and function optimally.
Quality replacement buttons are designed to meet the manufacturer’s specifications. This means they’ll fit perfectly into your vehicle without causing additional problems. Poorly made alternatives might not align properly or fail prematurely, leading to further inconveniences.
Additionally, using reputable brands can guarantee better performance. High-quality parts improve user experience and prevent issues such as window malfunctions or electrical failures from arising soon after installation. You want something dependable that won’t leave you stranded on a rainy day with an unresponsive window.
Another aspect to consider is warranty coverage provided by quality manufacturers. When investing in reliable components, you’re often protected against defects or premature wear through warranties that cheaper options don’t offer.
In essence, selecting top-tier replacement parts for your Swift power window button fosters peace of mind while enhancing safety and functionality every time you hit that switch.
Common Mistakes to Avoid During the Replacement Process of Power Window Switch for Suzuki Swift
When replacing the Power Window Switch For Suzuki Swift one common mistake is rushing through the disassembly process. Many tend to yank out components without properly loosening screws or clips. This can lead to damage not just to the button itself but also to surrounding materials.
Another frequent error involves paying attention to disconnecting the car battery before starting work. Failing to do so can result in accidental electrical shorts, potentially harming your and your vehicle’s electronic systems.
Using incorrect tools is another pitfall that DIYers often need help with. Using a screwdriver that doesn’t fit well or trying to use makeshift tools may strip screws or break plastic pieces, complicating what should be a straightforward task.
Many need to remember to keep track of small parts during disassembly. Losing screws or clips can delay reinstallation and create unnecessary frustration when you realize something is missing later on.
It’s essential not to overlook checking for additional issues after replacement. If the new swift power window button doesn’t function as expected, there might be underlying problems with wiring or fuses that need addressing rather than assuming it was an issue with the new part alone.
Conclusion
With the right approach, replacing the power window button in your Suzuki Swift is manageable. It opens up new possibilities for improvement, ensuring your driving experience remains smooth and hassle-free.
Taking care of such electrical components can prevent further issues down the road. Addressing problems promptly is crucial to maintaining functionality and keeping your vehicle looking its best.
FAQs
What should I do if my new power window button doesn’t work?
First, check all connections. Ensure that wires are securely connected and not damaged. If everything seems fine, the replacement part may be faulty or incompatible.
Can I clean my existing power window button instead of replacing it?
Cleaning can sometimes resolve minor issues like sticky buttons or dirt buildup. However, replacement is a better long-term solution if you notice consistent malfunctioning behaviour.
Are there aftermarket options for swift power window buttons?
Yes, many aftermarket parts are available. Ensure they meet quality standards and properly fit your Suzuki Swift model for optimal performance.
How much does it typically cost to replace a power window button?
Costs vary based on location and whether you choose genuine or aftermarket parts. On average, expect to pay anywhere from $30 to $100 plus labour costs if you opt for professional installation.


Leave Your Comment