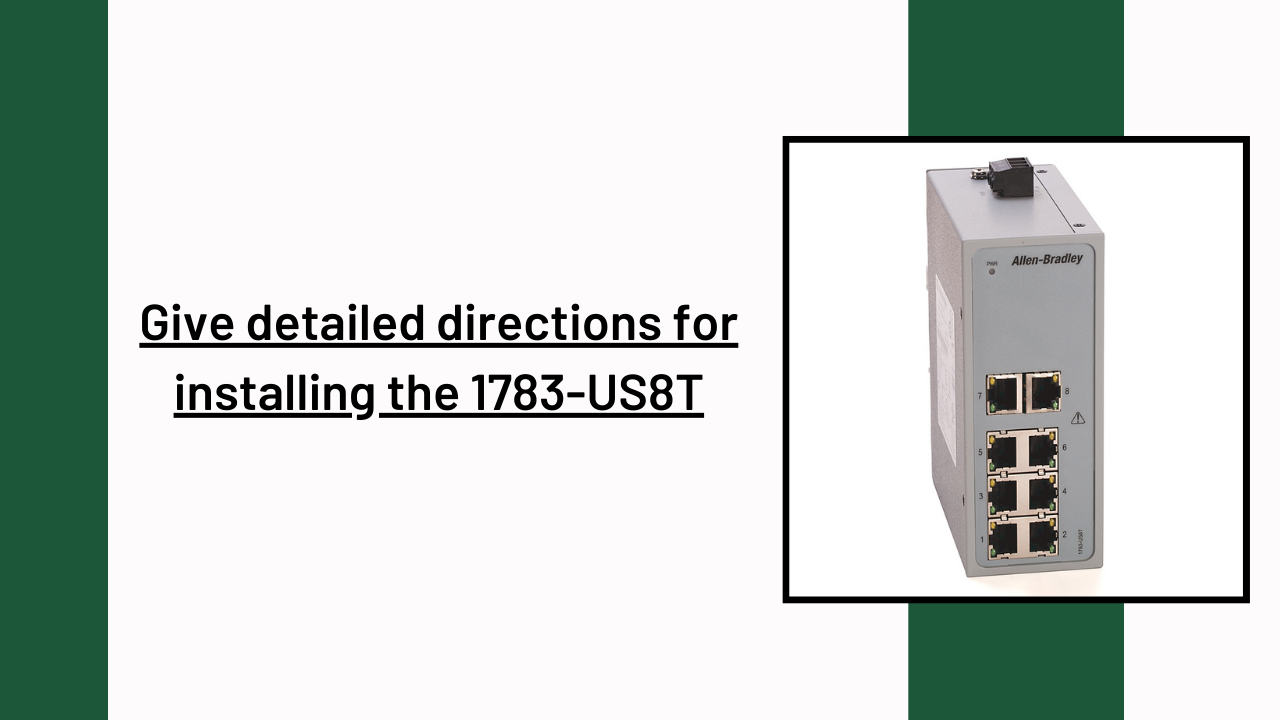
Give detailed directions for installing the 1783-US8T
Ethernet switches are essential for effective data transport in local area networks (LANs) in the field of networking. The Allen-Bradley 1783-US8T Ethernet Switch is a dependable option for meeting networking and industrial automation requirements. The goal of this step-by-step tutorial is to help customers install the 1783-US8T Ethernet switch without any problems and integrate it seamlessly into their network architecture.
1.Pre-Installation Preparations
- The Ethernet switch unit 1783-US8T
- Power supply or adapter (if not provided)
- Ethernet cords
- Hardware for mounting (if wall-mounted)
- screwdriver and the required mounting equipment
- To ensure the best performance and longest lifespan of the switch, make sure the installation site satisfies environmental criteria, such as those regarding humidity and temperature.
2.Selecting an Installation Location
Select a good spot to install the 1783-US8T Ethernet switch. Accessibility, ventilation, and closeness to power supplies and network equipment are all important factors to take into account. Choose a location that is safe, well-ventilated, and free from harsh weather conditions and other threats.
3.Mounting the Switch
Mark the locations on the wall where the screw holes need to be drilled using the mounting template that is included.
Make sure the holes line up with the mounting slots on the switch by drilling in accordance with the indications.
Make sure you use the right screws and mounting hardware to firmly attach the switch to the wall.
4.Powering the Switch
To power the 1783-US8T Ethernet switch, attach the power supply or adapter and plug it into a dependable power source. To avoid damage, make sure the power supply’s voltage rating complies with the guidelines provided in the switch’s literature.
5.Network Connectivity
Link the network devices (computers, printers, servers, etc.) to the switch’s open Ethernet ports using Ethernet cables. To preserve signal integrity and reduce interference, choose premium cables that are the right length.
6.Verification and Testing
After making all the necessary connections, turn on the switch and make sure the LED indicators, which show correct power and network connectivity, light up as expected. Make use of network diagnostic tools to make sure that all connected devices can interact with each other and that data transfer is operating as planned.
7.Configuration (Optional)
The 1783-US8T Ethernet Switch may require further configuration, depending on the particular requirements of the network. Use specialized software or a web browser to access the switch’s administration interface and configure features like port mirroring, Quality of Service (QoS), VLANs, and security measures.
8.Documentation and Maintenance
Maintain comprehensive records of the switch installation, including the location, configuration parameters, and any applicable network schematics. Establish a routine maintenance program to check the switch for wear, dust buildup, or any problems, guaranteeing continued dependability and functionality.
Users may improve data transfer efficiency and network connection in industrial and automation contexts by installing and integrating the 1783-US8T Ethernet Switch into their network infrastructure by following these easy-to-follow instructions.
We are Asteam Techno Solutions Pvt Ltd: the go-to company for industrial automation products. We make a contribution to the circular economy by providing all industrial automation products for businesses and factories and also providing service work for them. We provide automation solutions with reputed brands including Allen Bradley, Mitsubishi, Phoenix Contact, Siemens, Schneider, Moxa, VIPA and more. Currently our staff members are serve a growing number of national and international customers each day.


Leave Your Comment